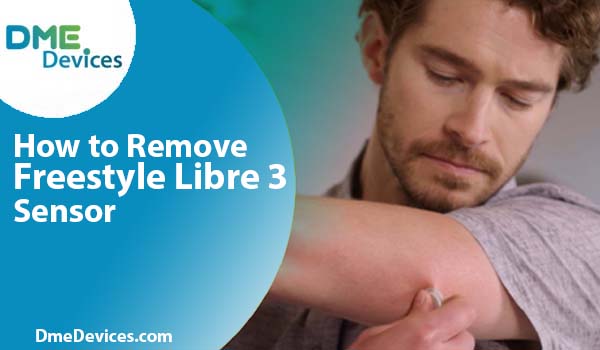
You have made it through the full 14 days with your sensor. It survived showers, that one time you accidentally knocked it against a doorframe, and sweaty workouts. But now the app is flashing “Sensor Ended,” and you are staring at your arm wondering how to remove freestyle libre 3 without causing unnecessary discomfort.
We have all been there. The adhesive on these devices is medical-grade—it is designed to stay put. This is excellent for wear time but can be difficult when it is time to take it off. If you pull it off quickly like an old bandage, you risk skin irritation.
Let’s discuss the proper method for removing freestyle libre 3 so your skin remains healthy for your next application. Knowing exactly how to remove a freestyle libre 3 sensor effectively is the key to long-term comfort. Many users find that learning how to remove freestyle libre 3 correctly prevents the “sensor tattoo” residue often left behind. By mastering the art of freestyle libre 3 how to remove, you protect your skin for future sensors.
Why Does It Stick So Hard?
Before we get into the “how-to,” it helps to understand the mechanism. The Freestyle Libre 3 is small—about the size of two stacked pennies. Because it has such a small surface area, the adhesive must be strong to keep it secured to your arm for the mandated 14-day period.
It uses a pressure-sensitive acrylic adhesive. Over time, your body heat helps the adhesive bond more securely to the skin. That is why learning how to remove freestyle libre 3 requires a different technique than peeling off a standard bandage.
The bond is chemically stronger on day 14 than it was on day 1. If you rush to remove freestyle libre 3, you are fighting against chemistry. By understanding the adhesive properties, you can master freestyle libre 3 how to remove steps with ease. Even if you have experience with older models, learning how to remove the freestyle libre 3 specifically is worth the effort because of its smaller profile and concentrated adhesive.
Quick Specs: Understanding the Device Components
| The Part | What It Is | The Real World Effect |
|---|---|---|
| The Sticker | Medical-grade Acrylic | Bond strengthens over the 14-day wear period. |
| The Filament | Flexible Hair-like tube | Sits just under the skin; slides out easily but must be handled with care. |
| The Housing | Hard Plastic | Provides a grip point, but requires gentle handling. |
When Should You Be Removing Freestyle Libre 3?
Typically, your receiver or smartphone app notifies you when the session has ended. However, there are specific medical or technical instances where you might need to proceed with removing freestyle libre 3 earlier than planned.
You might need to address how to remove freestyle libre 3 sensor setups early if:
Adverse Skin Reaction: If you experience severe itching, burning, or a rash, this may indicate contact dermatitis. Do not wait; remove freestyle libre 3 immediately to protect your skin.
Technical Failure: If the app displays a persistent “Sensor Error” or “Replace Sensor” message that does not resolve after following on-screen prompts, you will need to know how to remove the freestyle libre 3 safely.
Adhesion Failure: If the edges curl and the sensor filament is no longer fully inserted, readings may be inaccurate, and you must know how to remove freestyle libre 3 to replace it properly.
How to Remove Freestyle Libre 3: The Step-by-Step Method
To ensure skin integrity, knowing freestyle libre 3 how to remove correctly is vital. The goal is to minimize trauma to the skin barrier during the process.
1. Soften the Adhesive
Adhesives are often more difficult to remove from cool, dry skin. The ideal time for removing freestyle libre 3 is after a warm shower. The humidity helps loosen the adhesive edges, and the warmth makes the skin more pliable, which simplifies the task when you remove freestyle libre 3. This simple preparation is often overlooked when people ask how to remove freestyle libre 3 painlessly.
2. Use an Adhesive Remover
If a shower is not an option, or if you have sensitive skin, use a removal aid to break the chemical bond before you remove freestyle libre 3.
Baby Oil / Mineral Oil: Gentle and effective for most users.
Medical Adhesive Remover: Specific wipes (like TacAway or Uni-Solve) designed for CGM users.
Soak a cotton ball or tissue in the oil and dab it around the white fabric edge of the patch. Allow it to sit for 1–2 minutes. This “dwell time” is crucial when learning how to remove a freestyle libre 3 sensor painlessly, as it allows the fluid to penetrate the fabric and dissolve the glue. This step makes removing freestyle libre 3 much gentler on sensitive areas.
3. The “Low and Slow” Technique
This is the standard recommendation for how to remove the freestyle libre 3 to prevent skin tearing.
Do not pull UP. Pulling perpendicular to the skin increases the risk of pain when removing freestyle libre 3.
Pull BACK. Lift one edge and peel the sensor back over itself, keeping it close to the skin surface.
Support the Skin. Use your free hand to press down on the skin immediately next to the peel line. This “counter-traction” technique stabilizes the skin as you remove freestyle libre 3. It is the gold standard for how to remove freestyle libre 3 sensor devices without pain. If you follow this method every time you need to figure out how to remove freestyle libre 3, your skin will thank you.
Comparison of Removal Aids
| Removal Aid | Benefits | Considerations |
|---|---|---|
| Baby Oil | Inexpensive, widely available, moisturizing. | Can leave a greasy residue that affects new sensor adhesion. |
| Alcohol Wipes | Cleans and disinfects while removing. | Can be drying or stinging on irritated skin. |
| Adhesive Remover Wipes | Designed specifically for medical devices. | Additional cost; some contain strong scents. |
The Aftermath: Residue Management
After the device is off, you may see a dark, sticky ring—often referred to as the “sensor tattoo.” This is a combination of adhesive residue and lint that often remains after removing freestyle libre 3.
Knowing how to remove a freestyle libre 3 sensor completely includes proper cleaning.
Avoid Harsh Scrubbing. Aggressive friction can damage the top layer of skin.
Apply Oil. Apply mineral or baby oil to the residue and let it sit for 5 minutes.
Wipe Gently. Use a soft cloth to wipe away the loosened residue. Wash the area with soap and water afterward. This is the final step in how to remove freestyle libre 3 cleanly.
Skin Health and Site Rotation
Continuous Glucose Monitoring requires diligent skin care. According to the American Diabetes Association, maintaining skin integrity is essential for the long-term success of using diabetes technology. To maintain skin health, understanding freestyle libre 3 how to remove is just the first step.
Rotate Application Sites. Do not apply a new sensor to the exact site you just used.
Alternate arms every 14 days (per FDA-approved insertion sites).
If staying on the same arm, move the site at least 3 inches (7.6 cm) away from the previous spot.
Moisturize. After you remove freestyle libre 3 and clean the old site, apply a fragrance-free moisturizer to help the skin recover. Note: Do not apply lotion to the new site prior to insertion, as this will prevent the new sensor from sticking. Proper skin care is just as vital as knowing how to remove the freestyle libre 3.
Proper Disposal (CMS & Environmental Guidelines)
You have successfully finished removing freestyle libre 3. Disposal must be handled correctly to comply with safety and environmental standards.
The Freestyle Libre 3 contains a small silver-oxide battery and electronic components.
E-Waste vs. Household Trash: Regulations vary by municipality. While some areas allow disposal in household trash, the EPA and many local jurisdictions recommend treating sensors as electronic waste (e-waste). Check your local waste management guidelines after you remove freestyle libre 3.
Sharps Safety: The sensor itself generally does not require a Sharps container unless the needle filament is exposed and poses a hazard. However, the Sensor Applicator (used 14 days prior) MUST be disposed of in a FDA-cleared Sharps container.
Troubleshooting Common Issues
Here is a guide for common difficulties when figuring out how to remove freestyle libre 3.
| The Issue | Probable Cause | Suggested Action |
|---|---|---|
| Pain during removal | Adhesive pulling on hair or dry skin. | Pause removal. Saturate with oil/remover. Consider shaving the site before the next application. |
| Minor Bleeding | Filament may have grazed a capillary. | Apply firm pressure with clean gauze for 3 minutes or until bleeding stops. |
| Redness/Irritation | Rapid removal or contact dermatitis. | Use a skin barrier wipe (like Cavilon) before applying the next sensor. Consult a provider if the rash persists. |
Why Hydration Matters
Hydration plays a role in skin elasticity. Dehydrated skin is more fragile and prone to micro-tears during adhesive removal. Staying well-hydrated helps maintain skin turgor, potentially making the process of how to remove the freestyle libre 3 smoother and less damaging to the skin barrier.
Ready for Your Next Sensor?
Effective diabetes management involves consistency. Taking the time to learn how to remove freestyle libre 3 properly helps preserve your skin integrity, ensuring you can continue CGM therapy comfortably. Protecting your skin today prevents scarring and adhesion issues in the future. Now that you have mastered how to remove a freestyle libre 3 sensor, you are ready for the next cycle.
Once your site is clean and rested, you are ready to continue your monitoring. For extended wear and the latest accuracy standards, consider the upgraded options available.


Write a comment
Your email address will not be published. All fields are required